Installation basics
Installation media can be downloaded from the SYSCTL portal as an ISO-file for every installation type. For the ICC server, an Azure image is also available as an alternative to the ISO. Only the ICC server can be installed on Azure cloud infrastructure.
Getting the installation media
The following installation images are available for download from https://portal.sysctl.se:
- Impex USB Protect - installs a USB Protect station; see USB Protect installation instructions.
- Impex DataLock - installs a DataLock server.
- Impex ICC - installs an ICC server.
- Impex Repo - installs a Repo server.
- Impex ICC for Azure - a disk image used to deploy an ICC server on Microsoft Azure, as an alternative to the ICC ISO; see Azure.
Downloading and verifying an ISO works the same way for every product; the example below uses the ICC ISO, but the steps are identical regardless of which image was downloaded. The actual installation steps differ depending on the product - see USB Protect installation instructions for USB Protect, or Installation steps for ICC, Repo and DataLock for ICC, Repo and DataLock.
Download the ICC ISO from https://portal.sysctl.se and verify the SHA256 checksum:
sha256sum sysctl-icc-5.0.0.iso
or on a Windows system using PowerShell:
Get-FileHASH sysctl-icc-5.0.0.iso
Most common is to install the servers in a virtualization environment, but it is also possible to install the software on physical hardware. The USB Protect is always installed on physical hardware, and therefore needs the ISO written to a USB drive first.
Writing the ISO to a USB drive on Linux
Use the Linux command dd to write the ISO to a USB device, this is the most common approach for the USB Protect installation.
Before running the command, identify which device corresponds to your USB drive, for example with:
lsblk
Insert the USB drive and run lsblk again to see which new device appeared. Make sure the USB drive is not mounted before continuing; if it was auto-mounted, unmount it first with umount /dev/sdX1 (replacing the partition number as needed).
Then write the ISO to the device:
dd if=sysctl-usbprotect-5.0.0.iso of=/dev/sdX bs=4096 status=progress
Note: replace sdX above with the actual device found with lsblk. Probably it is sda, but please verify since using the incorrect device here could lead to irreparable harm to your computer, as dd will overwrite the target device without any further confirmation.
Once the command has finished, run sync to make sure all data has been flushed to the device before removing it.
Writing the ISO to a USB drive on Windows
On Windows, a tool such as Rufus (available from https://rufus.ie) can be used to write the ISO to a USB drive.
- Download and start Rufus.
- Insert the USB drive and select it under Device.
- Under Boot selection, select the downloaded ISO file.
- Rufus will ask which mode to use to write the image. It is important to select DD Image mode and not the default ISO image mode, since the Impex ISO is a hybrid image that must be written as a raw disk image.
- Click Start and confirm that all data on the USB drive will be erased.
- Wait for Rufus to finish writing and verifying the image before removing the USB drive.
Installation from the installation media
All installations are unattended and require only the root password to be configured with exception for USB Protect which does not have any static root password.
Installation in virtual environments
The software and installation media requires EFI enabled virtual hardware to boot. This must be configured before the installation starts.
USB Protect installation instructions
USB Protect comes preinstalled. These installation instructions are only required when reinstalling USB Protect or changing its deployment between a network-connected environment and an air-gapped environment, in either direction.
- Press “F12” to access the boot menu and select the option to boot from the USB.
- When the UEFI password prompt appears, do not type anything. Simply press Enter to log in as the default user.
- Select the desired option in the boot menu.
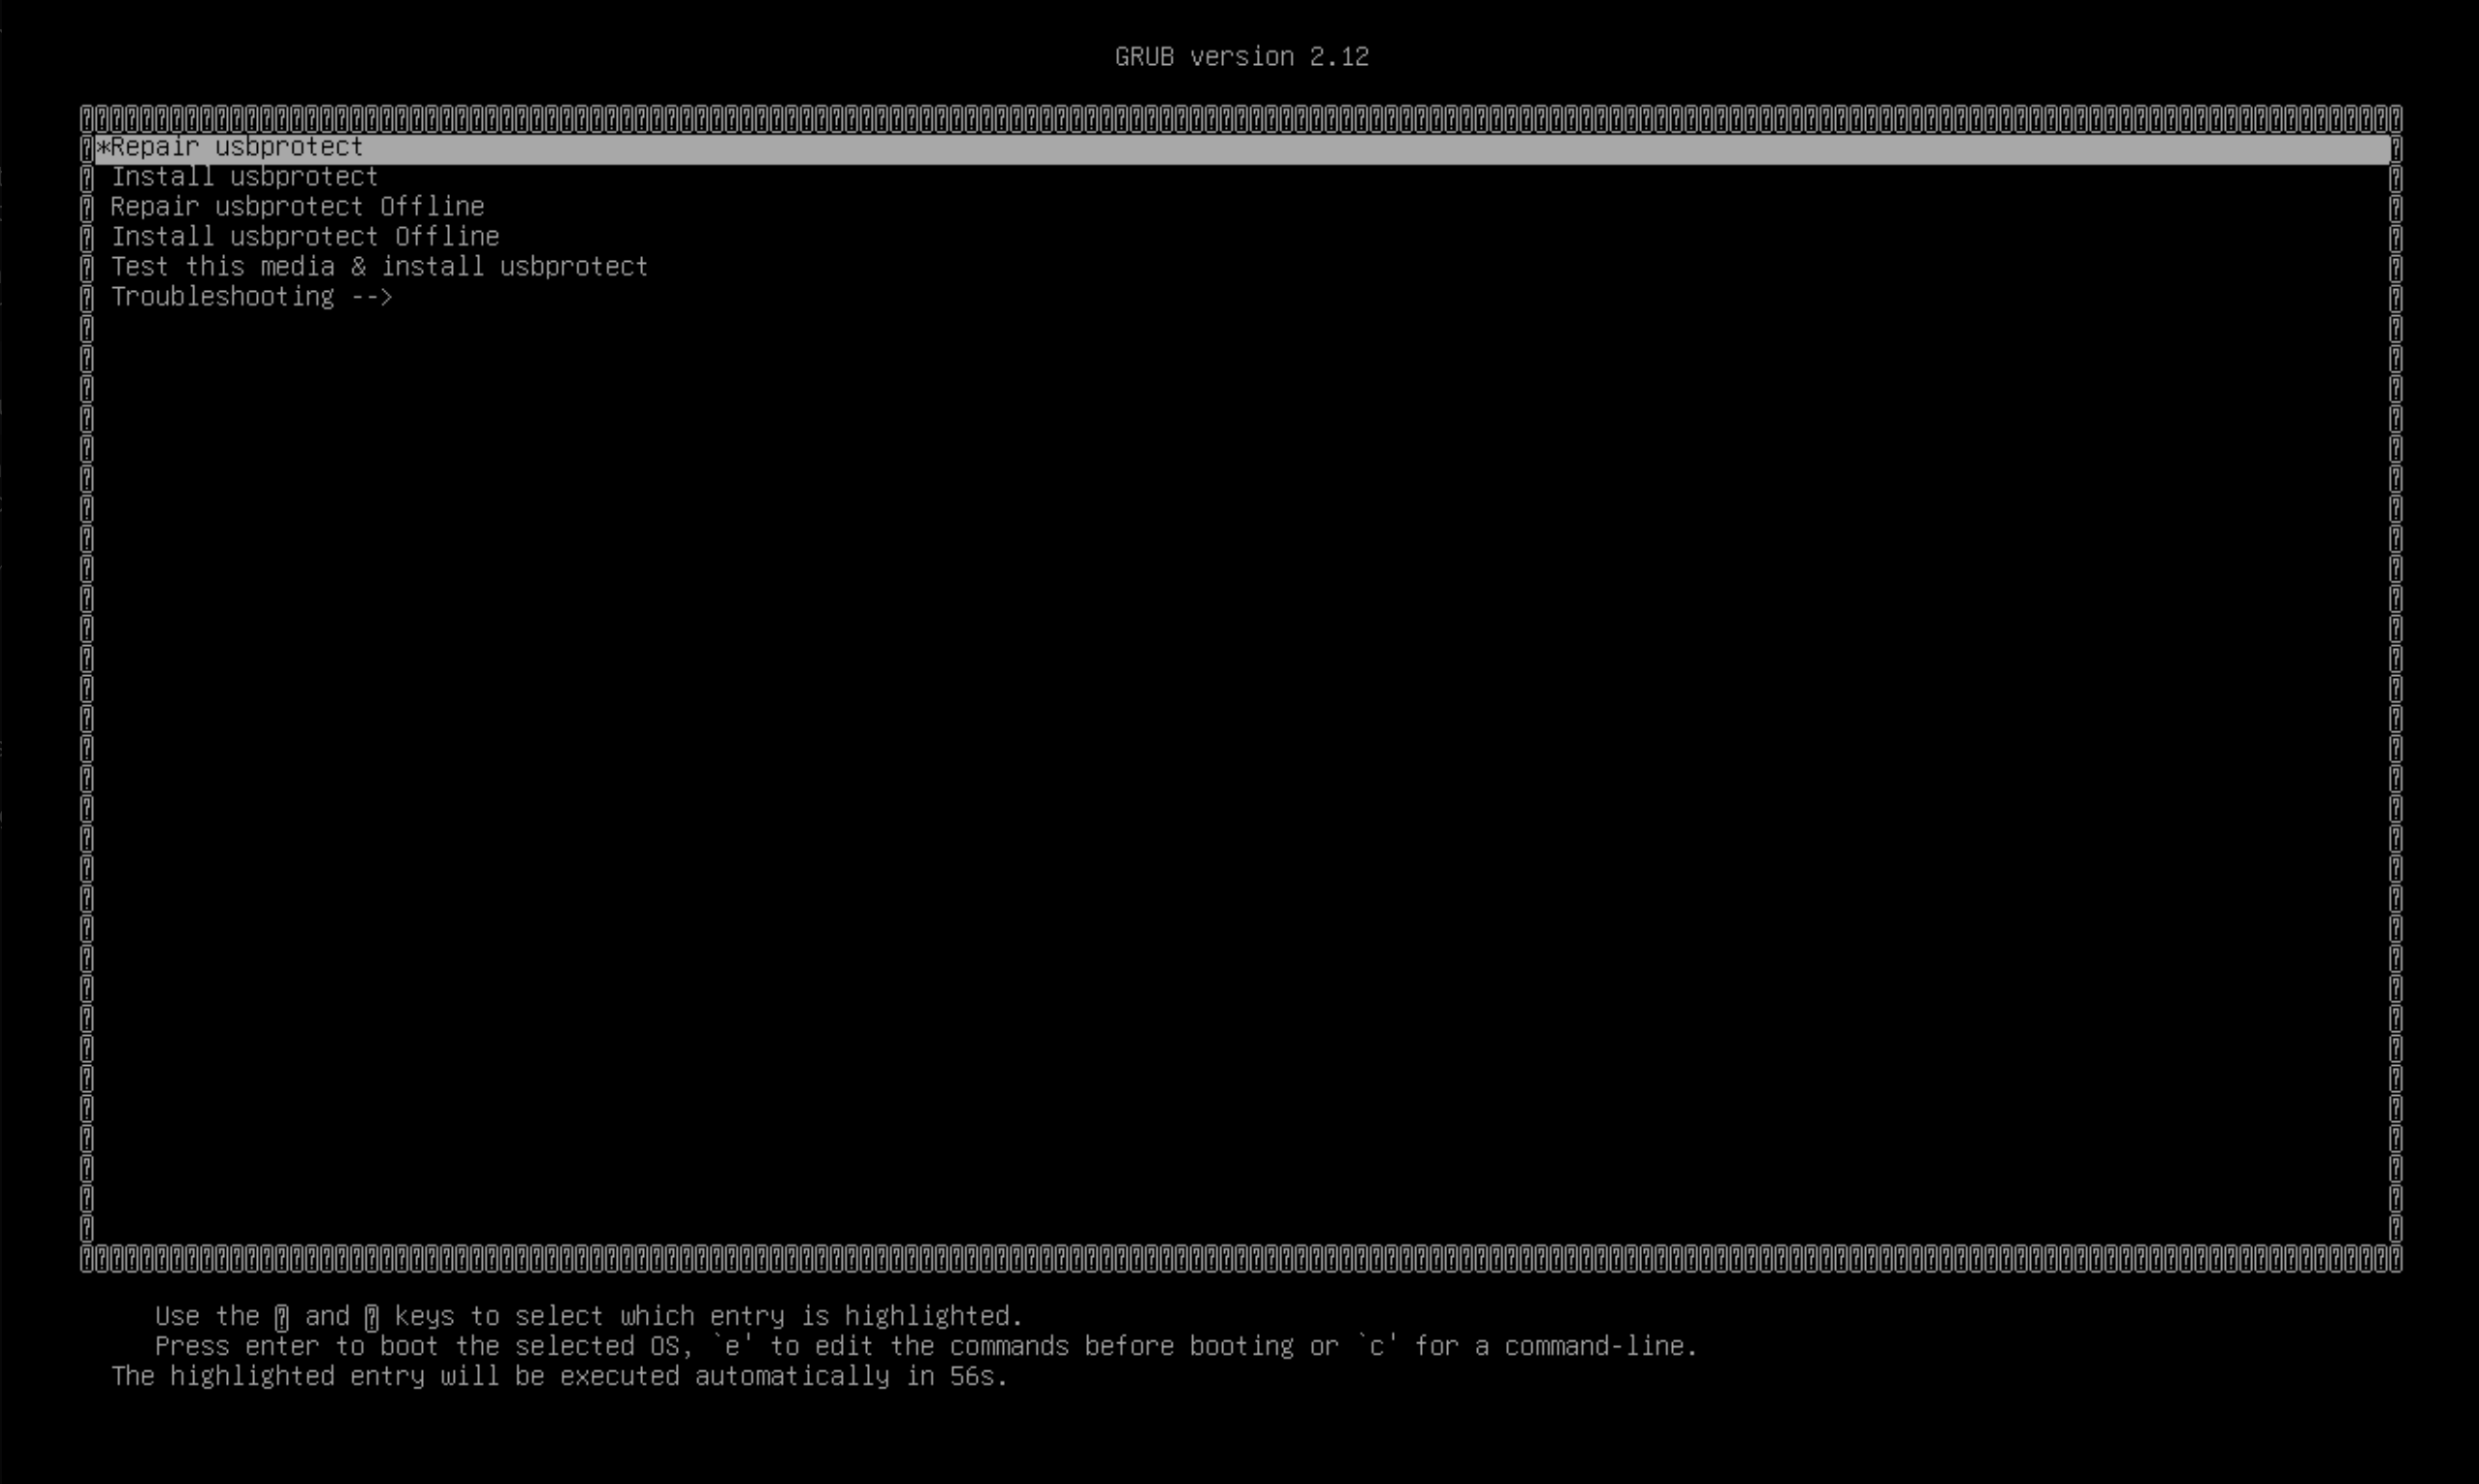
The USB Protect installation media offers four options:
- Install USB Protect - installs a new station that is connected to an ICC.
- Install USB Protect Offline - installs a new station that runs standalone, in offline mode.
- Repair USB Protect - upgrades or repairs an existing station connected to an ICC, preserving its current configuration.
- Repair USB Protect Offline - upgrades or repairs an existing station running in offline mode, preserving its current configuration.
If a USB Protect upgrade is necessary, follow the same procedure outlined above, but select the repair option that matches how the station is currently run. The installation will preserve the current configuration and apply it after the new installation.
To connect the station to an ICC server, refer to Connect to ICC in the USB Protect user manual for detailed instructions. The station must then be approved in the ICC before it can be used.
To set the station in offline mode, refer to USB Protect in offline mode in the USB Protect user manual for detailed instructions. A standalone (offline) USB Protect is not connected to an ICC and does not need to be approved.
Installation steps for ICC, Repo and DataLock
Choose the correct ISO for your installation and if needed, create a bootable USB. Boot the system from the installation media.
The installation will start to install after 60 seconds if no option is selected.
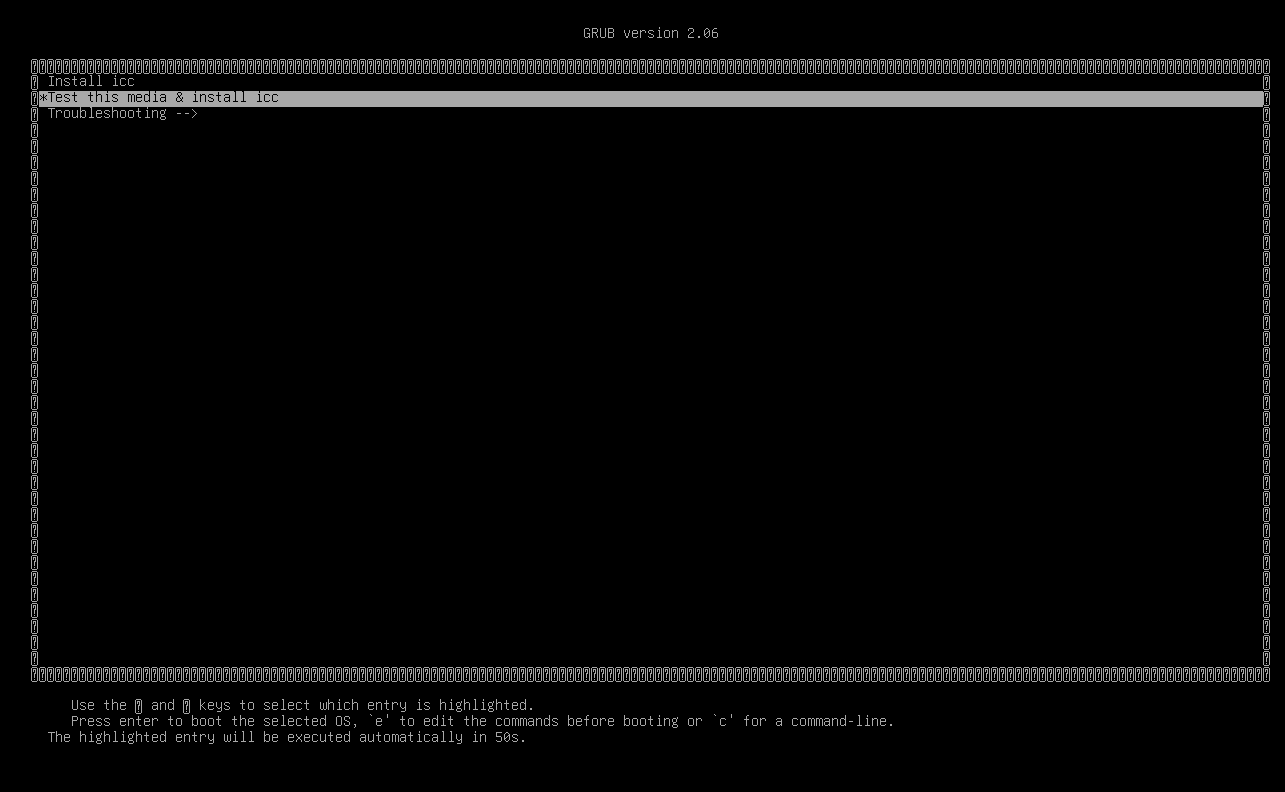
The image above is an example of a boot menu, taken from a USB Protect installation. The Repo and ICC installation media each only offer a single option, “Install Repo” and “Install ICC” respectively.
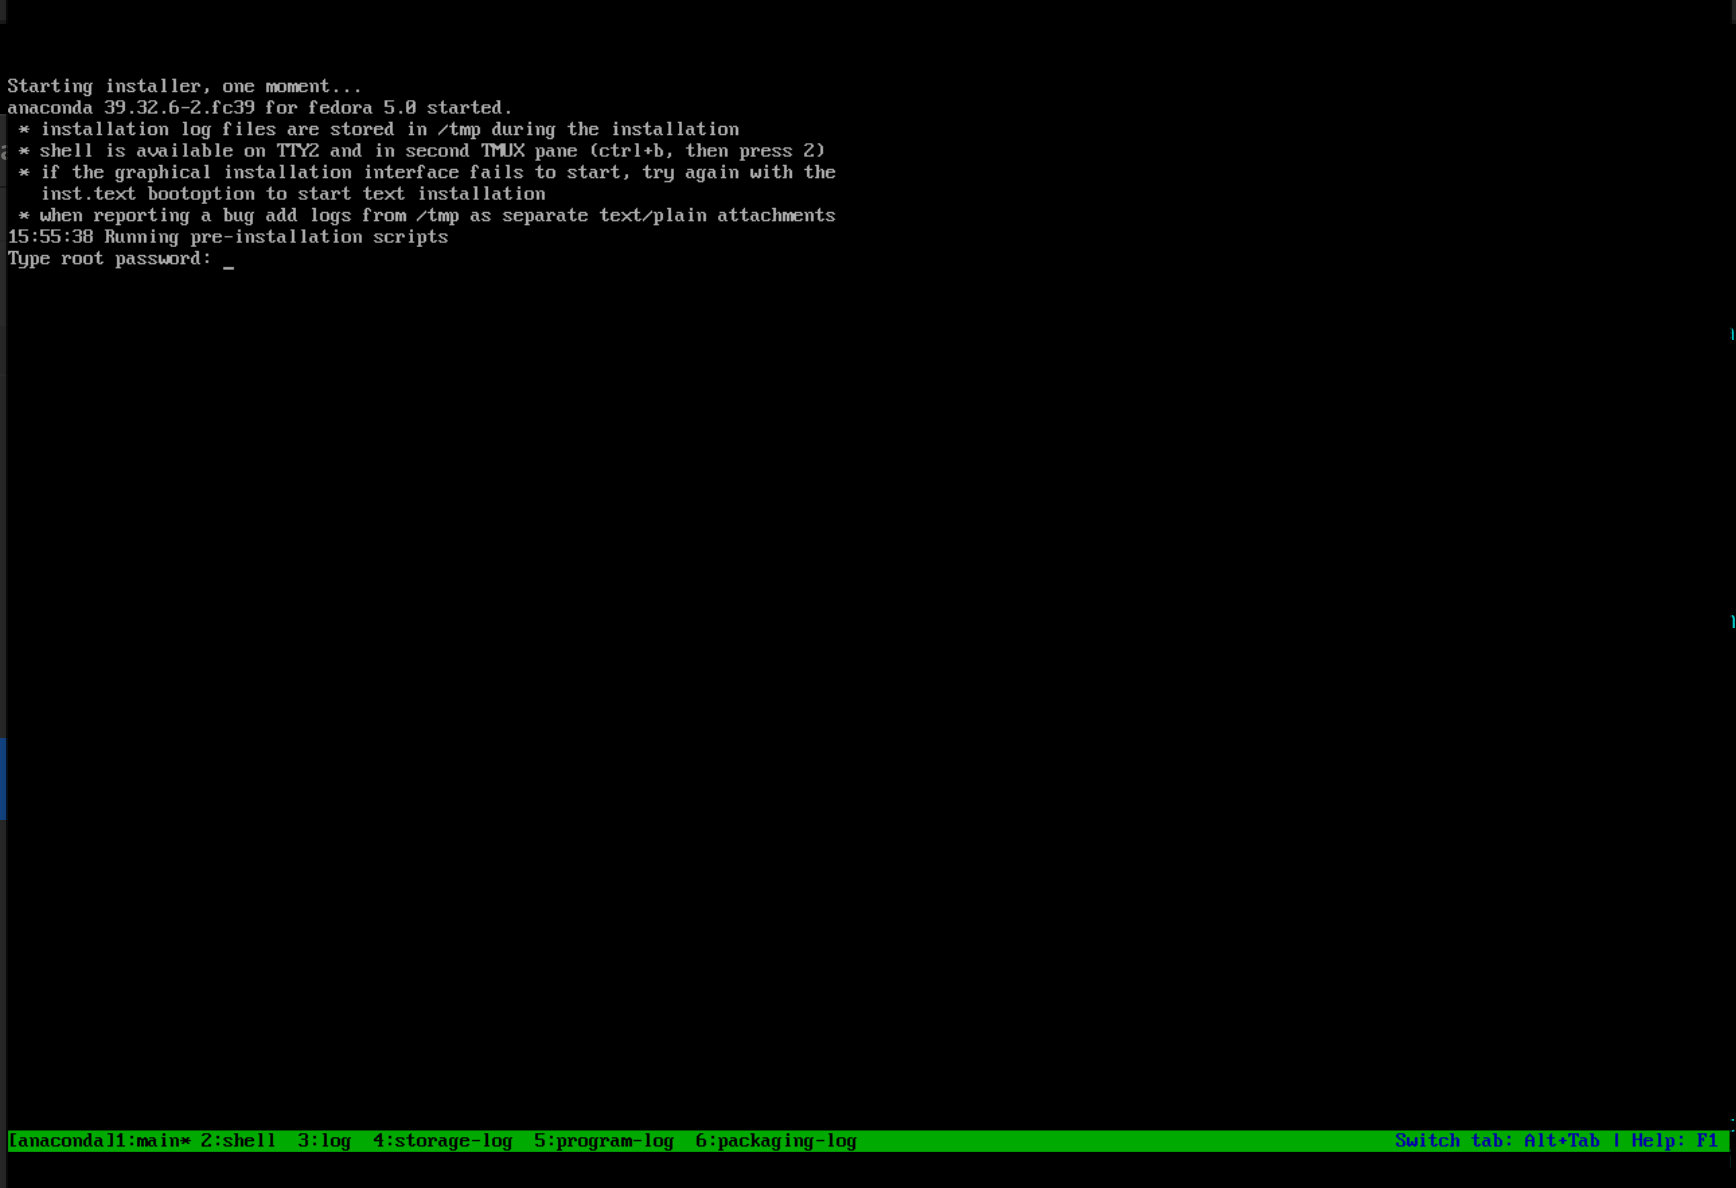
After one of the options has been selected the installation will begin and the harddrive will be wiped. If the ICC, Repo or DataLock has been selected you will be required to set the root password during the installation. If it is a USB Protect installation, the system will automatically look for a previous installation and copy the configurations from the old installation. If this is not the desired action, one can abort the installation after it has created a new filesystem and then boot again on the installation USB drive. This time the system disk will have been wiped and no previous configuration files will be found, making this a new clean installation.
Set a password for the root user if this is an ICC, REPO or DataLock installation. This is the initial account used for both SSH and console login and is needed during the initial configuration of the server. The username root and the password must be saved in a secure place, such as a password manager.
After the installation is completed, press enter to reboot.
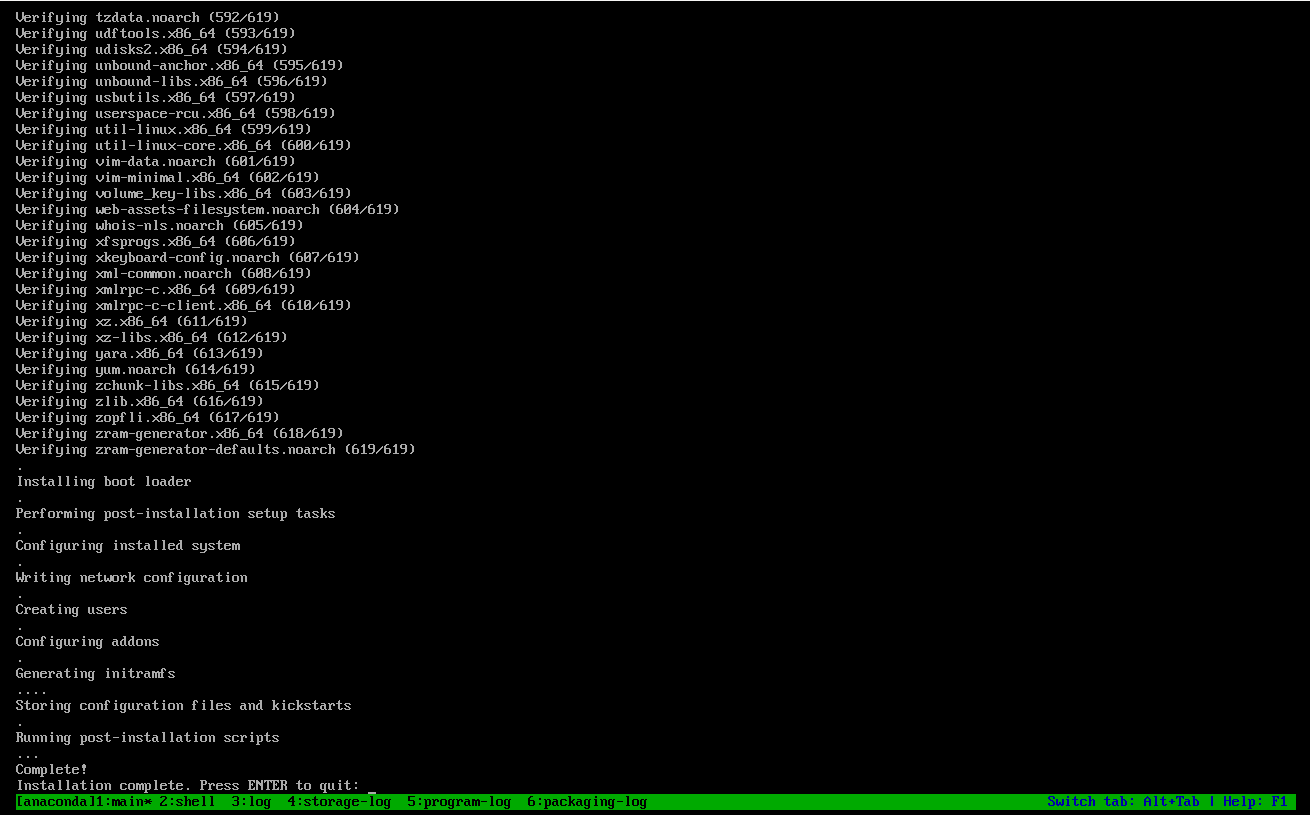
Once the installation is complete, additional configuration for the ICC and Repo servers, such as NTP, DNS and syslog settings, is done within the ICC application. DataLock must be approved in the ICC before it can be used.
Rolling back a version
Rolling back to an earlier version is only supported for USB Protect, Xtransfer and DataLock. It is not possible to roll back an ICC or Repo server to an earlier version.
This procedure should only be performed after discussing it with SYSCTL support.
- Download the earlier version ISO you want to roll back to, as described in Getting the installation media.
- Write the ISO to a USB drive, as described in Writing the ISO to a USB drive on Linux or Writing the ISO to a USB drive on Windows.
- Boot the station from the USB drive and select the repair option in the boot menu.
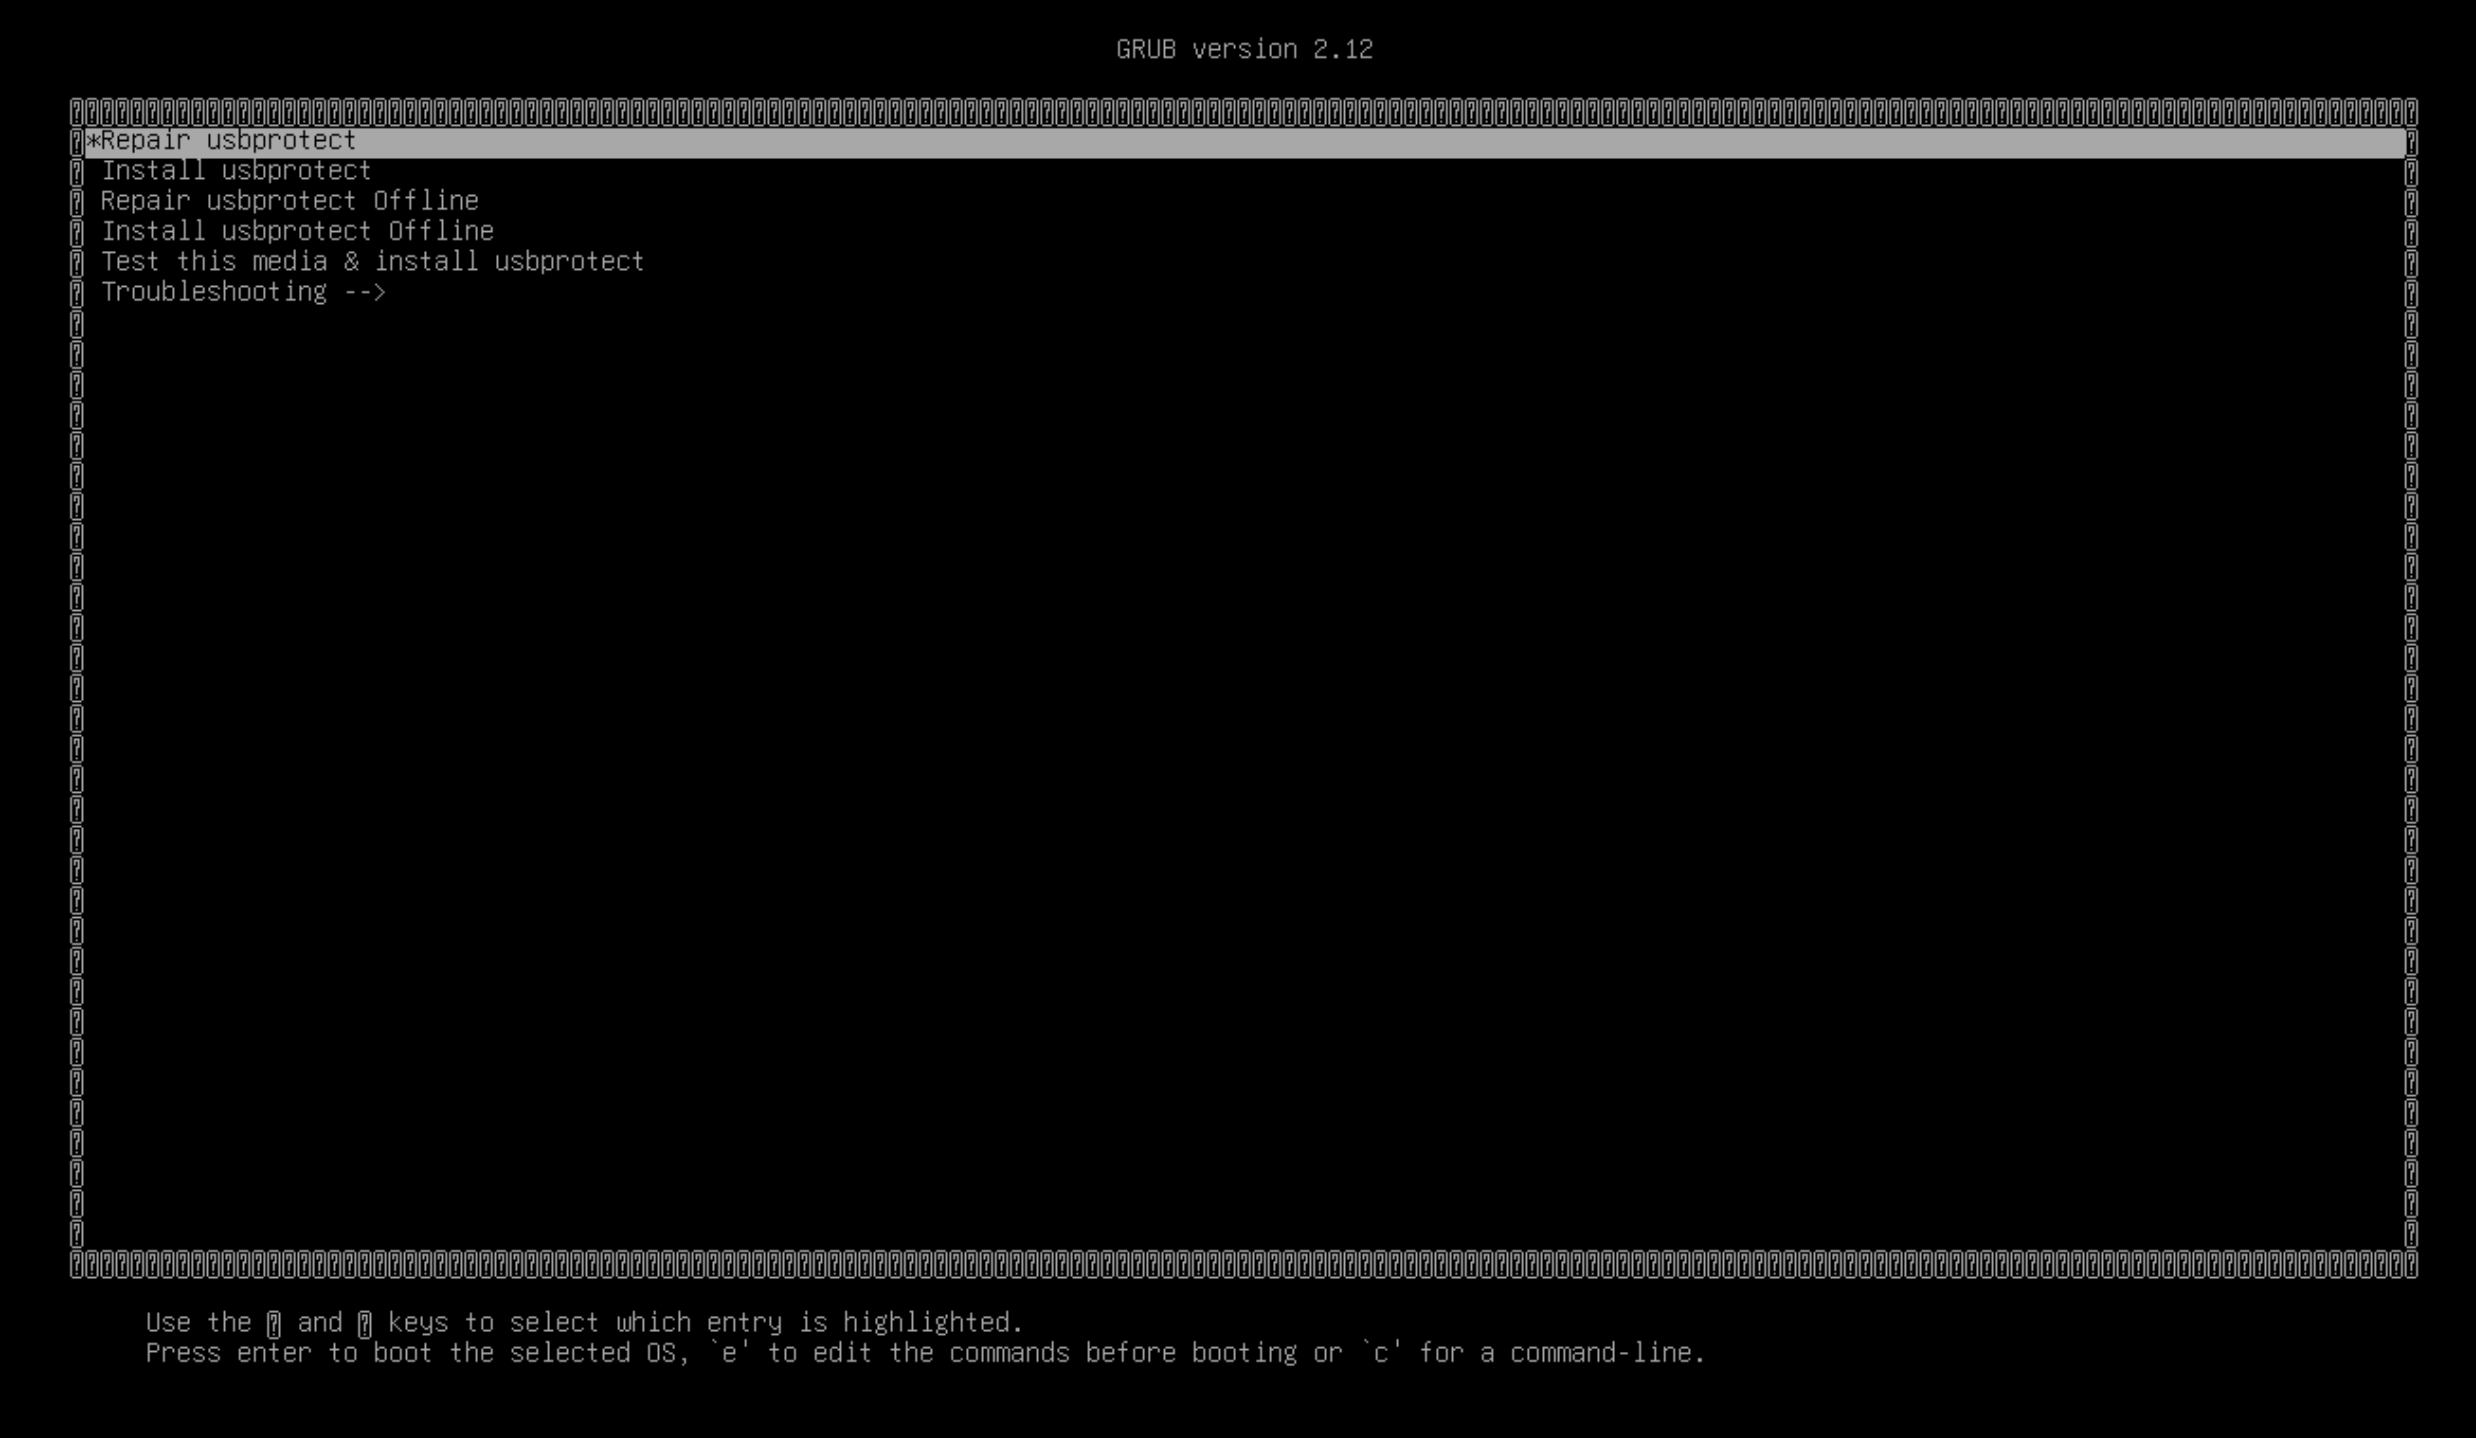
The installation will proceed the same way as a new installation, but the existing configuration will be kept. The station will retain its current IP configuration and, unless it is an offline station, will reconnect to the same ICC server automatically.
If an offline station is rolled back, the software and definition updates must be applied manually afterwards, following the same procedure described in Offline software installation and upgrades and Offline definition updates in the USB Protect user manual.
Azure
As an alternative to a physical or virtualized on-premises installation, the ICC server can be deployed on Microsoft Azure. This section describes how to obtain the installation image, set up the storage account and virtual machine, and expand the disk once the virtual machine is running.
Get the installation image
Download the Azure image from https://portal.sysctl.se
Note: Consult with SYSCTL before downloading the Azure installation image, since it is not rebuilt with every release. This ensures that you get the latest version.
Azure configuration
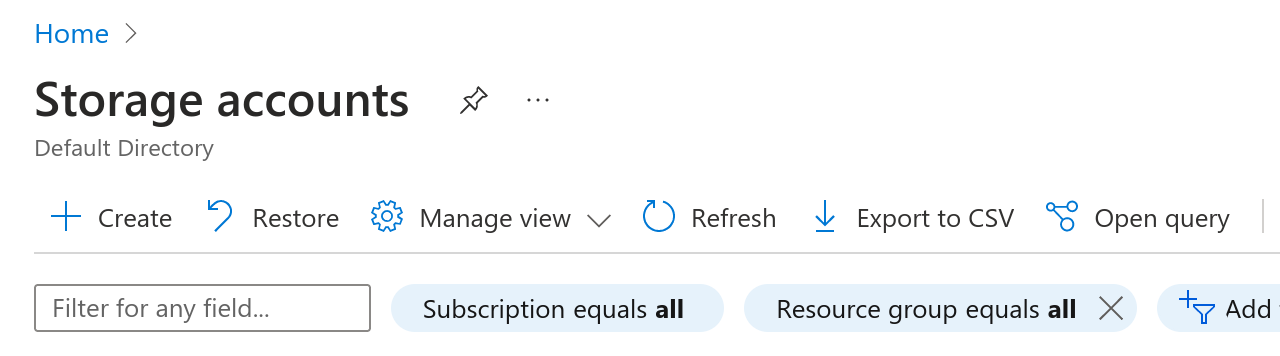
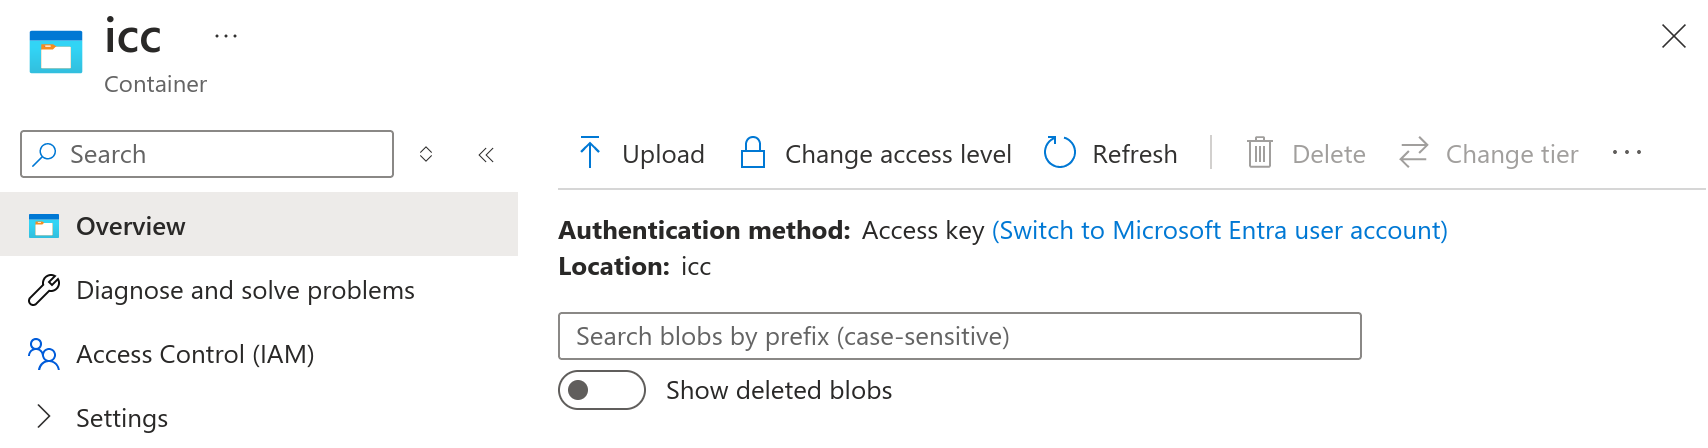
Create a storage account
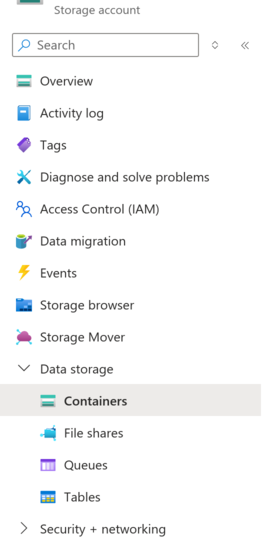
In the storage account, go to Containers
Create a new container
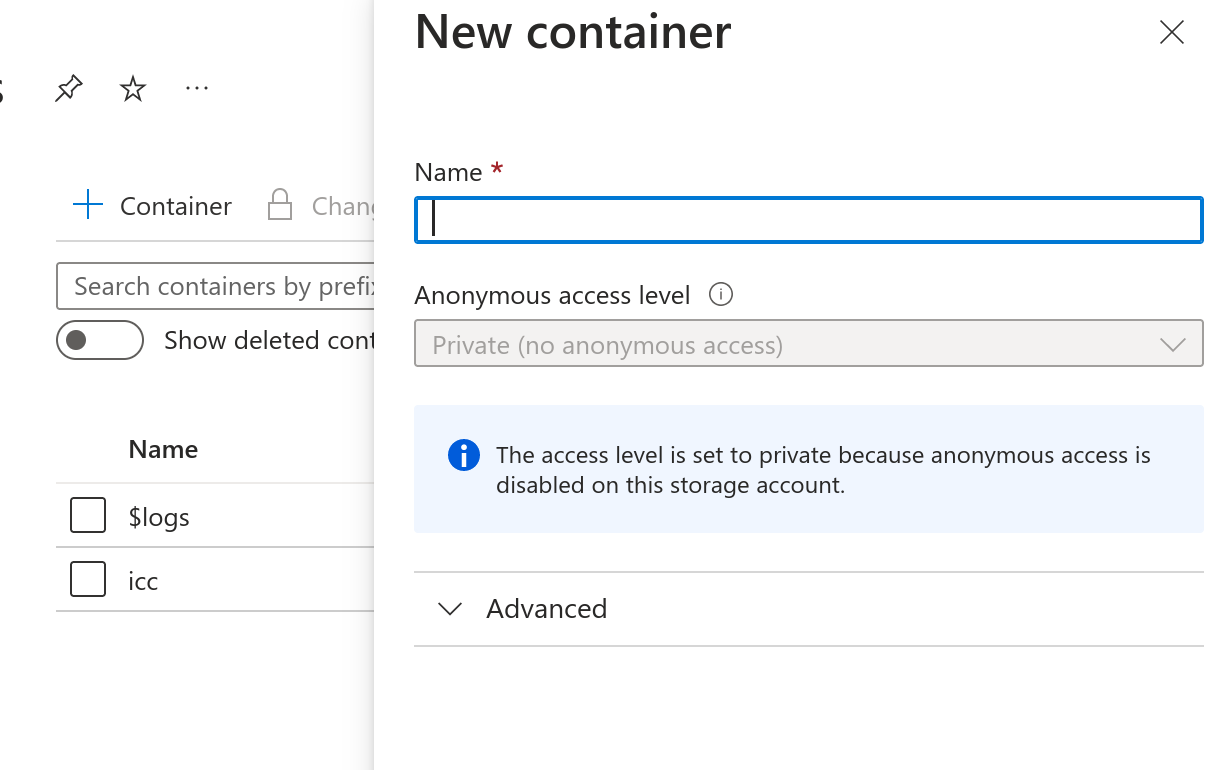
Upload the VHD-file to a Storage account under Data storage - Containers
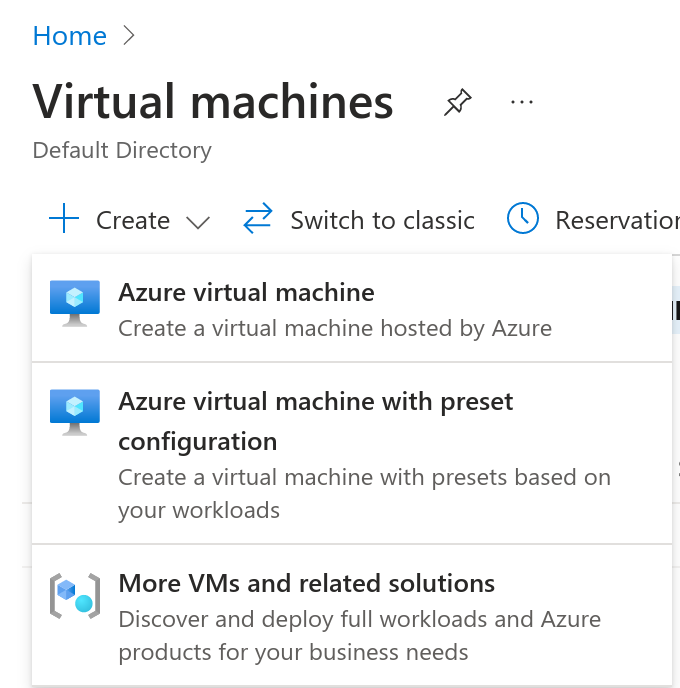
Go to Virtual machines and click on Create and select Azure virtual machine
The following configuration works with the image
- Subscription: Your subscription
- Subscription - Resource group: The resource for the image
- Virtual machine name: ICC or similar
- Image: The container image that was uploaded
- VM architecture: x64
- Size: 2vcpu 16GiB memory
- Authentication type: SSH public key or Password
- Public inbound ports: Depends on the installation architecture
- OS type: Linux
- VM generation: Gen 2
- Storage blob: the uploaded VHD-file
- Host caching: Read/write
- License type: Other
Expand the disk in Azure
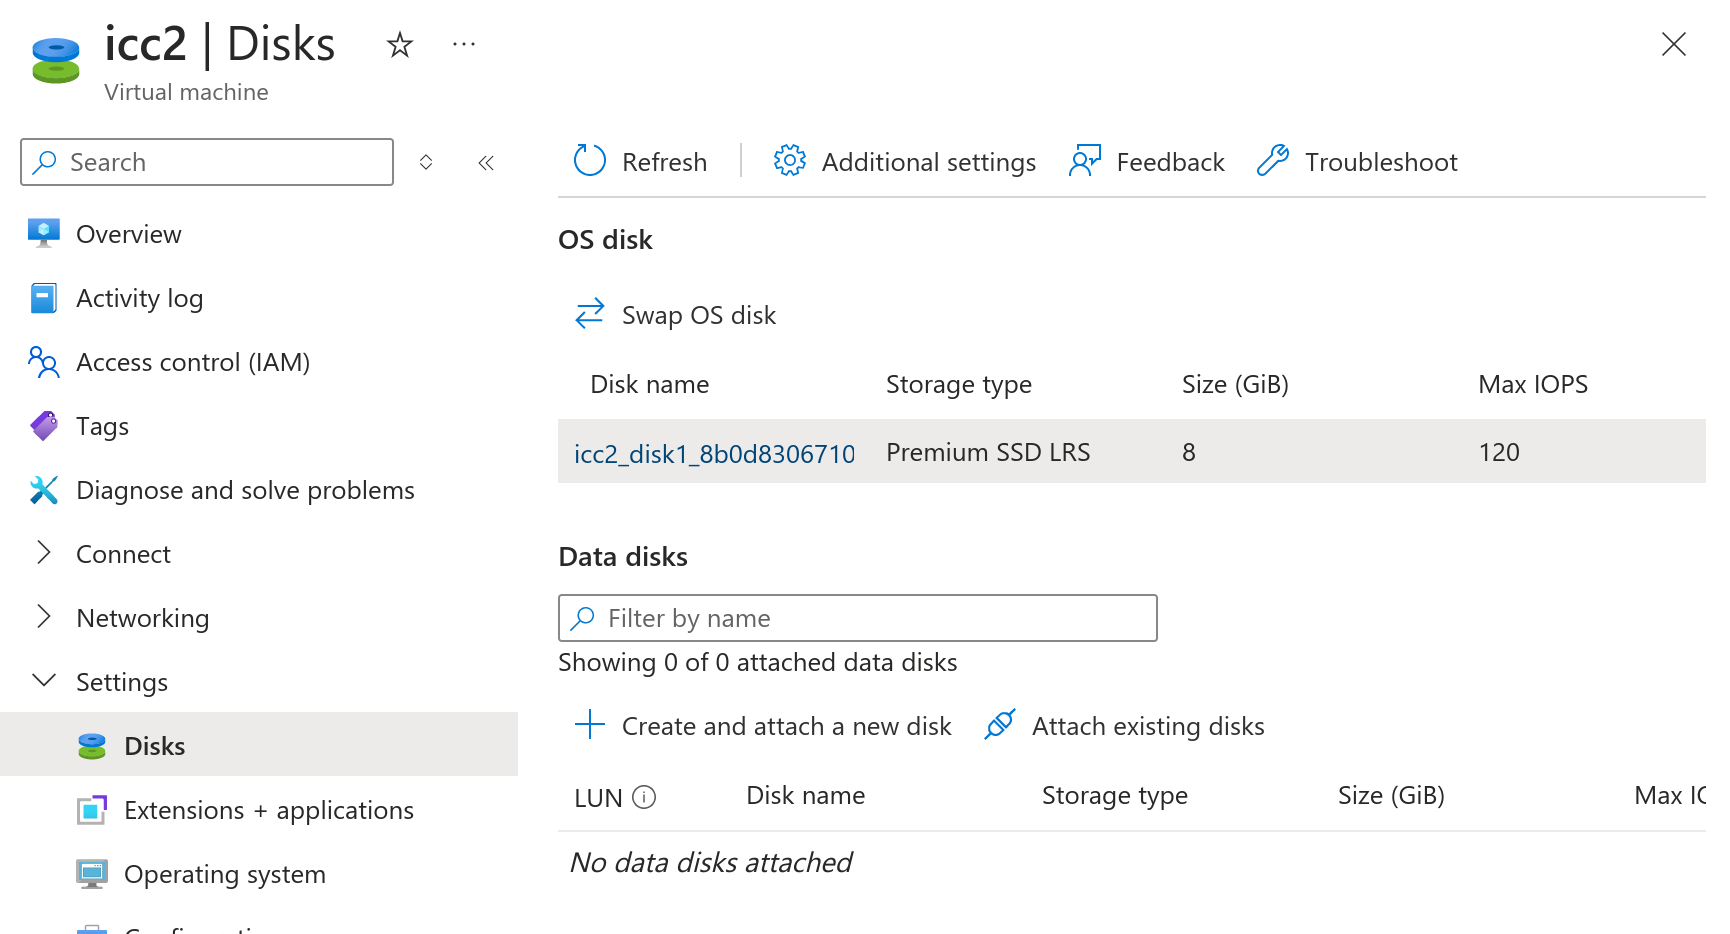
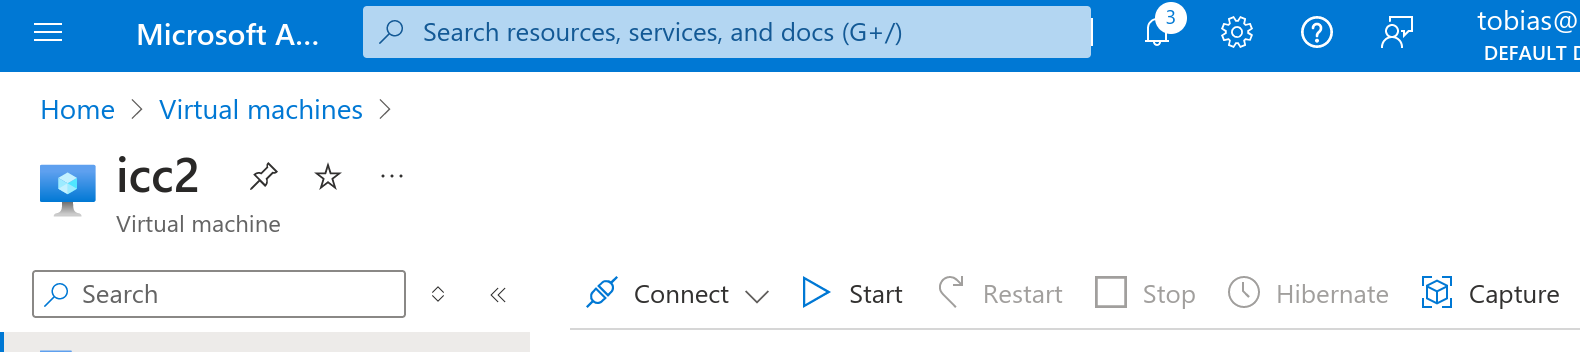
Go to the Virtual machine and select Settings -> Disks and the click on the Disk name
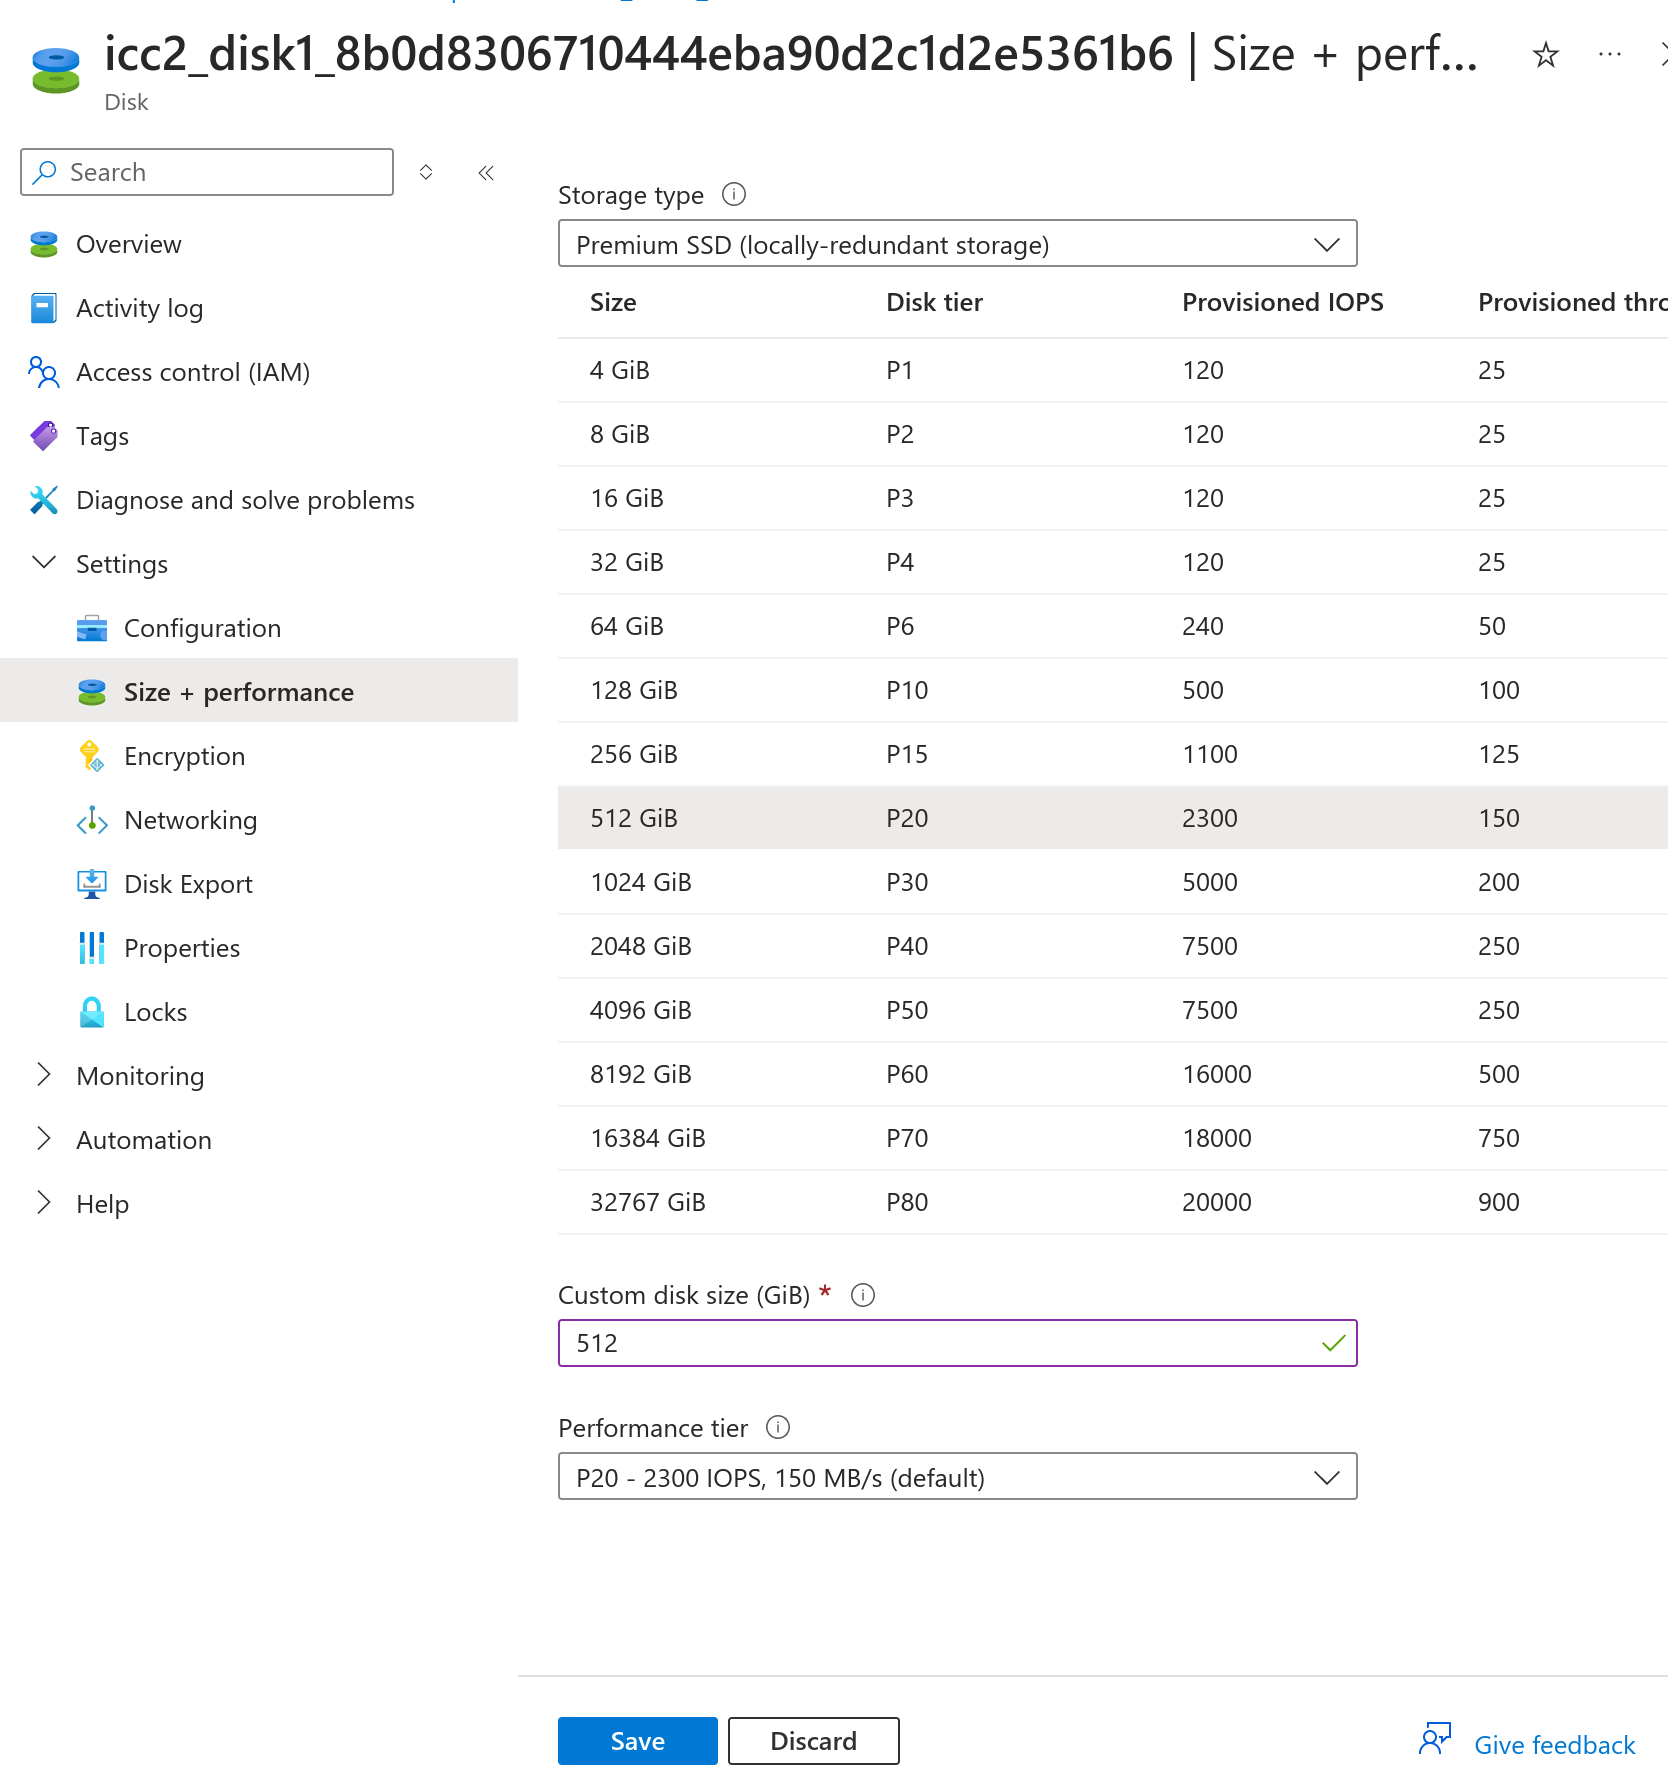
Select Settings -> Size + performance and select a larger disk and save
Start the Virtual machine
Initial configuration of the server appliances
These steps are only needed for the ICC, Repo and DataLock installations, and do not apply to USB Protect. One needs to configure IP addresses to allow SSH connection for the configuration of the Impex solution.
Log in to the console using the root user and the root password specified during installation.
Once logged in, the following steps need to be done:
- Configure IP address
- Expand partitions
- Set the hostname
- Install a certificate

IMPEX Configuration tool
Since certificate installation may require more complex configurations this must be a manual process. To create a certificate see the Operation Guide.
Everything else can be configured with a built-in interactive tool:
/root/configuration.py
The tool is menu-driven. You can configure IP settings, set the hostname, manage upstream ICC server settings, run network tests, and expand LVM partitions. Tests are included to quickly validate connectivity.
Available options vary by server installation
Use the number keys to select actions. Press CTRL+C during any step to safely abort and return to the current menu.
What it can do
- Configure static IPv4/IPv6
- Show configuration status
- Set system hostname
- Configure upstream ICC server and optional proxy
- Run network tests
- Expand LVM partitions interactively
Main menu
Configure IP (sub-menu)
- Set persistent IPv4/IPv6 on the default (or chosen) interface:
- Validates IPs/prefix/gateways
- Writes the configuration to the system and apply the configuration
Status (sub-menu)
- Status: shows hostname, default IPv4/IPv6, gateway, DNS, DNF proxy, ICC, and any icc lines in /etc/hosts
- Advanced Status: prints hostnamectl; ip -4/6 addr & route; keyfile summaries; ICC/proxy; /etc/hosts
Set system hostname
- Sets the hostname, After success, if either of these:
- Repo Installation you’ll be asked whether to regenerate IMPEX certificates: Removes all files in /opt/sysctl/impex-server/etc/apache/certs/ and restarts the service
- ICC Installation you’ll be asked whether to regenerate IMPEX certificates: Removes all files in /opt/sysctl/impex-server/etc/apache/certs/ and restarts the service
Expand partitions (sub-menu)
- A guided flow for LVM expansion: Prints PV free space from pvs (in GB)
- Lists all LVs (lvs) with VG/LV/path/size
- You choose the LV and enter how many GB to add
Configure Upstream ICC server
- Writes the upstream ICC server configuration
- Optional ask for proxy configuration
- Optional ask for hosts mapping for ICC server
Repo in standalone mode
- Configure the Repo server to be in standalone mode
Tests (sub-menu)
- ICC connectivity (ignore TLS warnings)
- ICC connectivity (verify TLS)
- Default gateway reachability
- ICC DNS resolution
Forget ICC configuration
- Forget the current upstream ICC server configuration
Manual Configuration
Configure IP address
Configure the IP address in the file “/etc/NetworkManager/system-connections/enp1s0.nmconnection” with the VI text editor. The interface name “enp1s0” can be another name depending on the hardware.
Edit the ipv4 and ipv6 sections:
[ipv4]

method=manual

address=1.2.3.4/24

gateway=1.2.3.1

dns=8.8.8.8;8.8.4.4;

[ipv6]

method=disabled

After completing the configuration, restart the network service with the following command:
systemctl restart NetworkManager
Verify that the server is reachable with SSH.
Expand partitions
The default partition layout may vary depending on the installation type and how the system is used. Since different installations are provisioned with different disk sizes, expanding the partitions is something that must be done after the installation, depending on the intended usage.
For larger installations, this should be discussed with SYSCTL support to determine the appropriate sizing. Smaller installations can typically use the default recommendations below.
To see the current partition table use the command df -h
Depending on the usage, expand the root partition and the var partition. The following example will expand the partitions with 100Gb and will work for the most common installations:
/usr/sbin/lvextend -r -L+100G /dev/mapper/root_vg-lv_root

/usr/sbin/lvextend -r -L+100G /dev/mapper/root_vg-lv_var
Set the hostname
The server needs to have a fully qualified domain name (FQDN) configured. The FQDN should reflect the subject alt name (SAN) in the certificate for the ICC and Repo server installation.
To configure hostname use the following command:
/usr/bin/hostnamectl set-hostname servername.domain.tld
When the hostname has been configured, the ICC service impex-icc must be restarted by executing the following command:
systemctl restart impex-icc
Install a Certificate
A trusted certificate is only needed for the ICC and Repo server. To create a certificate signing request, run the script:
/opt/sysctl/impex-server/tools/cert.sh
In the examples below EPOCH and FQDN are variables that will differ in your setup. EPOCH is the number of unix seconds since 1970 and FQDN should be replaced with the full hostname and domain of your server. For example icc.internal.example.com.
The script will create a private key and a certificate signing request (CSR) file located in /root/pki/EPOCH/fqdn.{key,csr}
Copy the CSR and let the issuing CA sign the request.
Copy the /root/pki/EPOCH/FQDN.key to /opt/sysctl/impex-server/etc/apache/certs/FQDN.key
Add the signed certificate to /opt/sysctl/impex-server/etc/apache/certs/FQDN.crt. This file must also include intermediate CA certificates, sorted from leaf to root. This starts with the leaf and then the issuing CA certificate of the server certificate and must range up to the root CA certificate. The file must include the concatenation of the various PEM-encoded CA Certificate files, in certificate chain order.
The file must have the certificates in the following order:
- Leaf certificate (server certificate).
- Issuing certificates
- Root certificate
Ensure the /opt/sysctl/impex-server/etc/apache/conf.d/cert.d/cert.conf match the correct path to the certificates and private key.
SSLCertificateFile /opt/sysctl/impex-server/etc/apache/certs/FQDN.crt
SSLCertificateKeyFile /opt/sysctl/impex-server/etc/apache/certs/FQDN.key
Once the new certificate is installed, restart the web service with the following command:
systemctl restart impex-server
Add Certificate Trust in ICC
The ICC server needs to trust the certificate authority used in the Repo server. To trust the certificate copy the root CA certificate to:
/etc/pki/ca-trust/source/anchors/repo_ca.crt
then update the trust store with the command:
update-ca-trust
Verify with curl that the Repo server is trusted by executing the command:
curl https://servername.domain.tld
Running Repo in Standalone Mode
The Repo server can be operate in standalone mode when upstream updates need to be downloaded and forward to isolated environments.
To enable standalone mode, run the following script on the Repo server:
/opt/sysctl/impex-repo/scripts/standalone.py
During execution, the script will prompt for:
- Upstream repo username (required)
- Upstream repo password (required)
- Proxy (optional)
- create_update_archive y/n
Once the script has completed, the Repo server will be running in standalone mode.
The create_update_archive option will also generate the following files:
- https://fqdn/impex/impex_repo.tgz
- https://fqdn/av/impex_av.tgz
These files can be downloaded and used to import the data into an ICC server in environments without external network connectivity.
Configure ICC appliance
All other configurations must be done from the graphical web interface (https://fqdn). To login to the interface use the default user name admin and the pregenerated password which is saved in the file /root/icc_admin. This initial credential must be provided to the person who needs access to the ICC. Once logged in, the password can be changed and configuration can be made according to the ICC manual.
Note: additional local accounts, or central accounts, for the ICC can be configured within the application.
Connect a DataLock to the ICC
The DataLock server must be connected to a ICC server. By editing the file:
/etc/dnf/dnf.conf
and adding the setting icc_server=https://hostname.domain.tld, according to the Subject Alt Name in the certificate. The DataLock will connect to the ICC with TOFU (Trust On First Use) and store the root-certificate in the trust store. The DataLock will only do TOFU during the first initial connection to the ICC.
Reinstalling or migrating the ICC
This chapter is mainly for customers who need to reinstall or migrate their ICC server, for example after a hardware failure or as part of a planned migration to new hardware, and covers using the ICC’s backup and restore feature to carry the server’s state across the reinstallation. General backup recommendations are described in the Operation Guide, and the backup/restore feature itself is documented in more detail in the ICC application’s own manual.
Of the Impex products, only the ICC server needs to be backed up. The ICC holds the database, signify keys, logs, quarantined files, SSH keys, yara rules and TLS certificates for the whole solution, so backing it up preserves the state needed to restore or migrate the entire installation. USB Protect, Repo and DataLock do not require backups since they either hold no persistent state of their own or can be reconfigured from the ICC.
ICC Backup
If the ICC server runs on a virtualization platform, backups can alternatively be taken at the hypervisor level, for example as a VM snapshot or an image-level backup. This captures the entire server and is a viable alternative to the application-level backup described below.
Creating a backup
Select the “Backup” view on the left pane in the ICC.
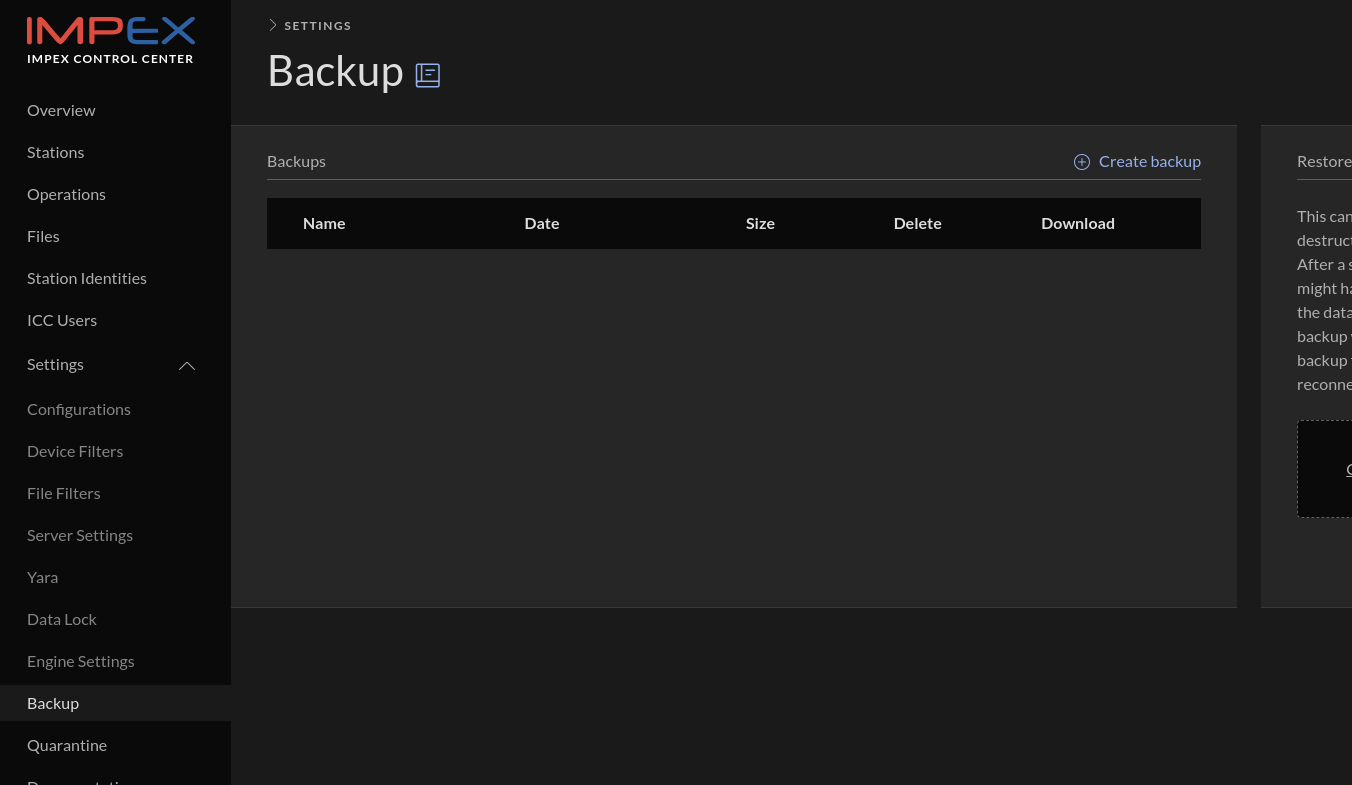
Click “Create backup” and then after a while, depending on how much data needs to be archived, the following view should appear.
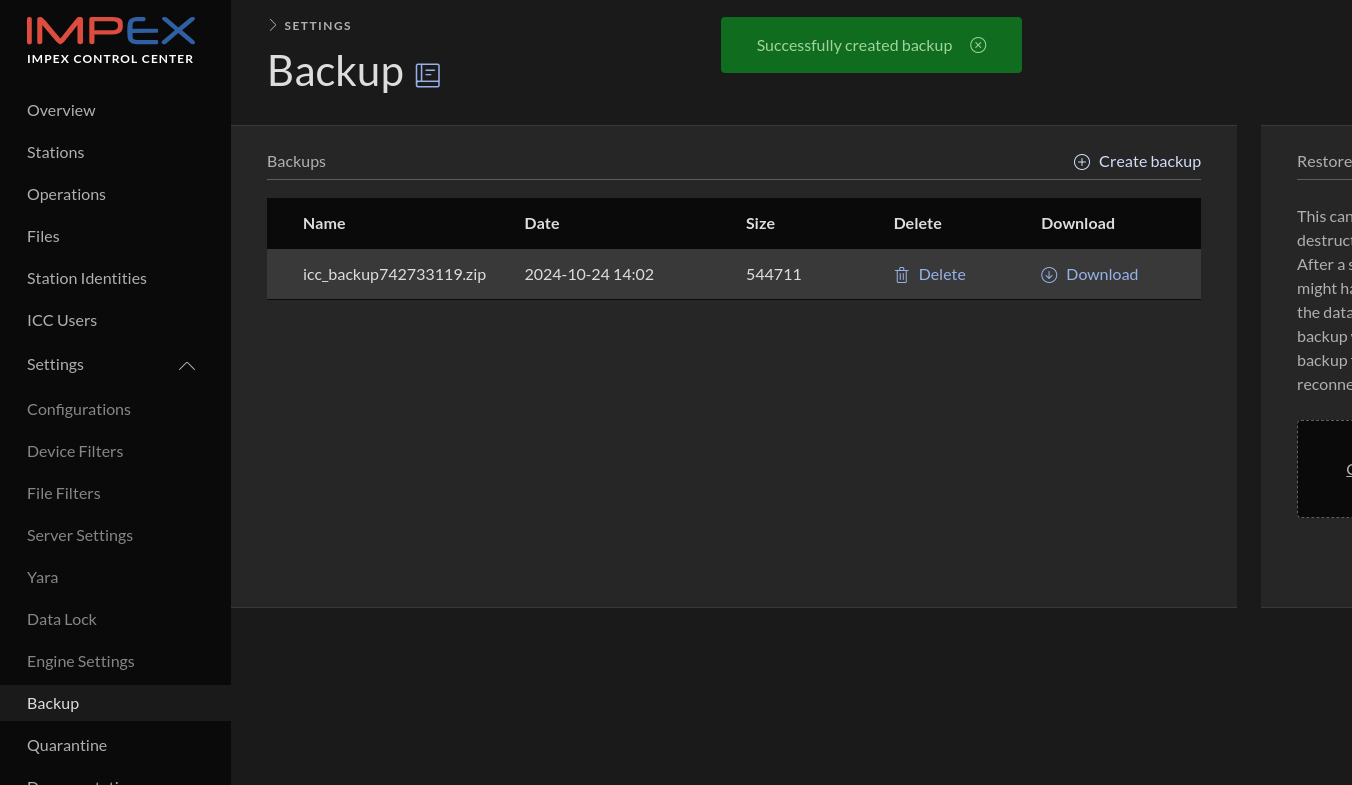
Download the file, which will be called icc_backup.zip on disk when downloaded. This file contains ICC secrets so make sure that no one not authorized can access it.
Restoring a backup
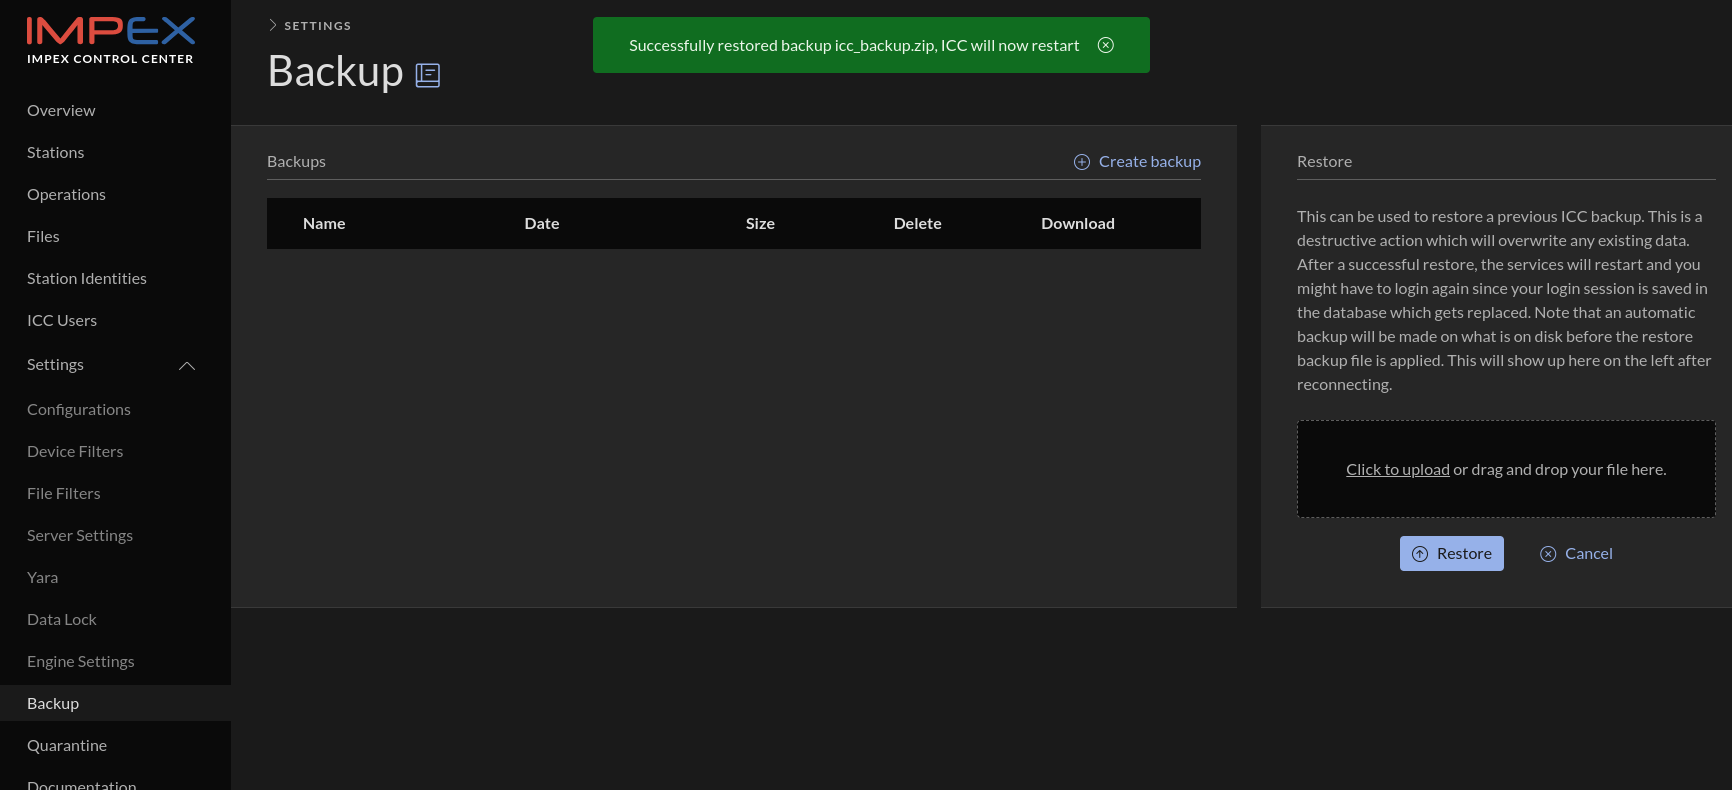
Go to the “Backup” view, select the previously downloaded file in the “Restore” card and click “Restore”.
The file will then be uploaded and unpacked and verified by the ICC. If all is ok it will then continue to restart the ICC services. Since the database was replaced your login session will be cleared and you will need to login again with the password the account had during the time of the backup.
Migrating ICC to new server
A new machine needs to be installed from the ICC ISO and then a backup from the old ICC can be restored on the new ICC installation.
The steps are:
- Create a backup on the old ICC server
- Download the backup from the old ICC server. The archive contains secrets and must be well protected.
- Shutdown the old ICC
- Install the new ICC server, according to Installation steps for ICC, Repo and DataLock.
- Update the IP configuration and hostname on the new ICC so it is identical to the old ICC
- Reboot the new ICC
- Login to the admin GUI on the new ICC server and go to backup view
- Select the previously backed up file in the Restore card and click “Restore”
- Verify that all the stations are still connected by checking the “Last seen” field on the station card. If not, contact SYSCTL support
The backup includes the database, ICC signify keys, logs, quarantined files, ssh keys, yara rules and TLS certificates.
If the migration is from a 4.x.x installation to a 5.x.x installation the repository configuration must be reconfigured, ensure to get the old username and password and potential proxy configuration stored in /etc/yum.conf
Note: The ICC server uses HSTS, this will deny users from accessing the web application on the newly installed ICC server until it has a trusted certificate. The trusted certificate will be restored from the backup which requires access to the web application. To circumvent this issue it is possible to use the browser’s privacy mode (called incognito, inPrivate or private mode depending on the browser of your choice).
Doing a backup and downloading it
Follow the steps described in Creating a backup to create and download the backup archive.
Install a new ICC and restore the backup archive on it
Download the ICC iso from https://portal.sysctl.se, boot on it and install a new ICC. Ensure that the disk is large enough.
After the ICC is installed, go to the “Backup” view, select the downloaded file in the “Restore” card and click “Restore”.
The file will then be uploaded and unpacked and verified by the ICC. If all is ok it will then continue to restart the ICC services. Since the database was replaced your login session will be cleared and you will need to login again.
To verify all went well you can for example check that the Station cards have appeared in the Stations view.
Do the swap
If any error messages showed up in the backup or restore logs on the Backup view, contact SYSCTL support, do not proceed with the swap until you have cleared it with SYSCTL support.
Now that the data from the old ICC has been migrated to the new it is time to shut down the old ICC. After it has been shut down, change the IP address and hostname on the new ICC to finish the takeover. Reboot the new ICC and verify that the stations are able to communicate with the new ICC by checking the “Last seen” field on the station cards.
Troubleshooting
If you see “To access ICC you need to use a hostname, FQDN or ip configured in ALLOWED_HOSTS” message in your web browser when surfing to the new ICC you have not configured the IP or/and the hostname correctly. Doublecheck hosts files, IP configuration and hostname. To set a new hostname:
hostnamectl set-hostname somename.example.org
systemctl restart impex-icc